引言:认识QuickTVUI
QuickTVUI是一个专注于大屏应用快速开发的轻量级框架。它基于Vue语法,开发者只需编写标准的Vue页面代码,即可高效完成大屏应用的开发工作。下面通过一个完整的拼图游戏案例,演示从需求到实现的完整流程。
第一步:智能生成Vue代码(DeepSeek助力)
首先我们需要获取符合QuickTVUI规范的Vue代码。通过精心设计的提示词,DeepSeek能够准确生成所需代码:
关键提示词要点
1. **语法规范**:Vue2语法 + TailwindCSS样式
2. **样式限制**:禁用动态宽度(w-[700px])、阴影、动画、鼠标样式、grid布局
3. **标签要求**:禁用svg/iframe/button/i标签,列表必须使用<ul :horizontal="true">标识横向
4. **文本规则**:所有文字必须用<span>包裹且明确对齐方式(text-center等)
5. **数据绑定**:统一使用this.model进行数据管理
6. **方法规范**:初始化使用init()方法,禁用computed属性
(注意:QuickTVUI支持Vue3,我编写的项目模版要求使用Vue2语法, 仅仅是为了与DeepSeek高效结合)
参考提示词
我编写了一个网站VUE编辑小站,它支持在线开发VUE项目。
编写项目需要输入2部分内容,一部分是编写的页面标签,另一部分是编写页面方法。
页面标签的规则如下:
1、页面是Vue2语法
2、页面使用tailwindcss样式,不支持w-[700px]这样的指定宽度
不支持阴影,不支持动画,不支持鼠标样式cursor-,不支持auto值,含有flex时明确flex-row还是flex-col,
不支持grid布局
3、根标签不需要使用template因为我内部已经处理
4、页面不支持<svg><iframe><button><i>标签
5、列表使用ul标签,li标签,当为横向列表时加入属性<ul :horizontal="true">,如果未超出屏幕,则无需使用
6、class不支持继承,所有的文字需要用span标签
7、span需要标识文字对齐例如text-center
8、所有的绑定数据在this.model上
9、如果设置border需要设置border-color
页面方法的规则如下:
1、页面初始化时默认会调用init方法,我一般在init方法中写this.model={...this.model}
2、不支持computed,不要在方法体中加入computed
3、格式是这样的
methods:{
  init(){
    this.model={...this.model}
  }
}
根据上述规则,帮我写一个拼图游戏
生成的页面代码
<div class="flex flex-col items-center justify-center h-screen bg-gray-100">
  <div class="mb-4">
    <span class="text-lg font-bold text-center">拼图游戏</span>
  </div>

  <div class="flex flex-col border-2 border-gray-400 bg-white">
    <div v-for="(row, rowIndex) in model.board" :key="rowIndex" class="flex flex-row">
      <div
        v-for="(tile, colIndex) in row"
        :key="colIndex"
        @click="moveTile(rowIndex, colIndex)"
        class="border border-gray-300 flex items-center justify-center"
        :style="{
          width: '80px',
          height: '80px',
          backgroundColor: tile === 0 ? '#e5e7eb' : '#f3f4f6',
          cursor: tile !== 0 ? 'pointer' : 'default'
        }"
      >
        <span v-if="tile !== 0" class="text-2xl font-bold text-center text-gray-700">{{ tile }}</span>
      </div>
    </div>
  </div>

  <div class="mt-6">
    <div
      @click="resetGame"
      class="px-6 py-2 bg-blue-500 text-white rounded text-center"
    >
      <span class="text-center">重新开始</span>
    </div>
  </div>
</div>
生成的方法逻辑
methods: {
  init() {
    this.model = {
      ...this.model,
      board: [
        [1, 2, 3],
        [4, 5, 6],
        [7, 8, 0]
      ],
      solved: false
    }
  },

  moveTile(row, col) {
    if (this.model.solved) return;

    const tileValue = this.model.board[row][col];
    if (tileValue === 0) return;

    // 检查上下左右是否有空白格子
    const directions = [
      {dx: -1, dy: 0},  // 上
      {dx: 1, dy: 0},   // 下
      {dx: 0, dy: -1},  // 左
      {dx: 0, dy: 1}    // 右
    ];

    for (const dir of directions) {
      const newRow = row + dir.dx;
      const newCol = col + dir.dy;

      if (newRow >= 0 && newRow < 3 && newCol >= 0 && newCol < 3) {
        if (this.model.board[newRow][newCol] === 0) {
          // 移动格子
          const newBoard = JSON.parse(JSON.stringify(this.model.board));
          newBoard[newRow][newCol] = tileValue;
          newBoard[row][col] = 0;

          this.model.board = newBoard;
          this.checkSolved();
          break;
        }
      }
    }
  },

  checkSolved() {
    const solvedState = [
      [1, 2, 3],
      [4, 5, 6],
      [7, 8, 0]
    ];

    const isEqual = JSON.stringify(this.model.board) === JSON.stringify(solvedState);
    if (isEqual) {
      this.model.solved = true;
      setTimeout(() => {
        alert('恭喜!拼图完成!');
      }, 100);
    }
  },

  resetGame() {
    // 创建初始状态
    let tiles = [1, 2, 3, 4, 5, 6, 7, 8, 0];

    // Fisher-Yates 洗牌算法
    for (let i = tiles.length - 1; i > 0; i--) {
      const j = Math.floor(Math.random() * (i + 1));
      [tiles[i], tiles[j]] = [tiles[j], tiles[i]];
    }

    // 转换为二维数组
    const newBoard = [];
    while (tiles.length) {
      newBoard.push(tiles.splice(0, 3));
    }

    this.model.board = newBoard;
    this.model.solved = false;
  }
}
第二步:集成到工程项目
- 获取基础工程:
git clone https://gitee.com/chenddcoder/esapp-public.git
- 在IDE中打开(推荐WebStorm/IDEA)
- 代码集成:
- 页面代码 → 插入到
home.vue的<ark-page>标签内 - 方法代码 → 插入到
methods对象中
- 页面代码 → 插入到
第三步:UI优化与焦点控制
问题发现
初始效果基本可用,但存在两个明显问题:
- 拼图格子尺寸过小(80x80px)
- 缺少TV端必备的焦点控制
解决方案
1. 调整格子尺寸(修改style中的宽高值):
:style="{
  width: '160px',  // 放大到160px
  height: '160px',
  ...
}"
2. 添加焦点控制:
<!-- 为可交互元素添加焦点属性 -->
<div
  @click="moveTile(...)"
  :focusable="true"
  :enableFocusBorder="true"
  :focusScale="1.05"
  ...
>
3. 设置初始焦点:
<div
  class="..."
  :requestFocus="true"
>
最终效果展示
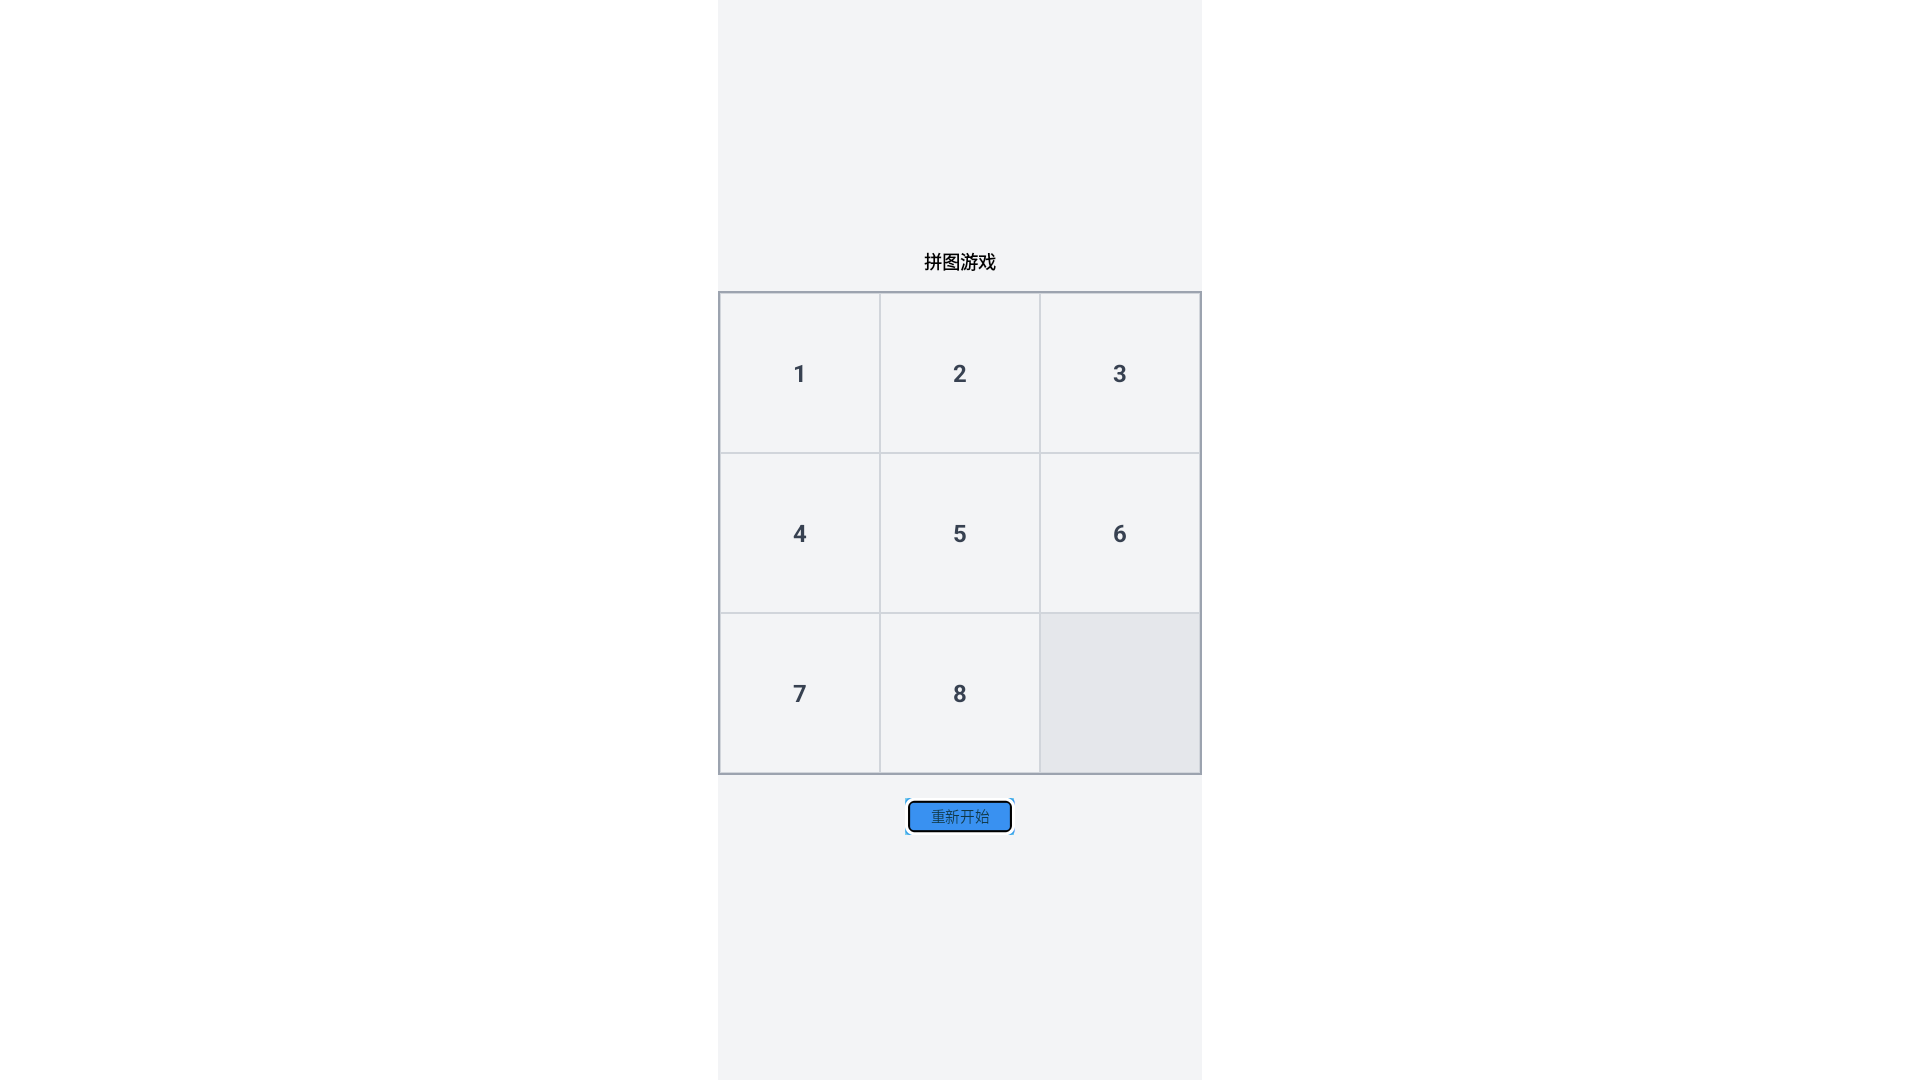
完成后的拼图游戏界面,支持焦点导航和放大交互
项目地址与源码
完整项目已开源,欢迎参考: 🔗 https://gitee.com/chenddcoder/esapp-puzzle.git
开发总结
通过QuickTVUI框架,我们实现了:
- 高效开发:利用DeepSeek生成基础代码
- 快速集成:10分钟完成项目搭建
- 精准优化:针对性解决TV端特有需求
- 焦点控制:完美适配遥控器操作
QuickTVUI大幅降低了TV端开发门槛,尤其适合需要快速迭代的大屏应用场景。其「Vue语法+智能生成+焦点系统」的组合,为传统TV开发提供了现代化解决方案。